Getting Started
This guide explains how the plugin is configured from scratch inside the CLion IDE.
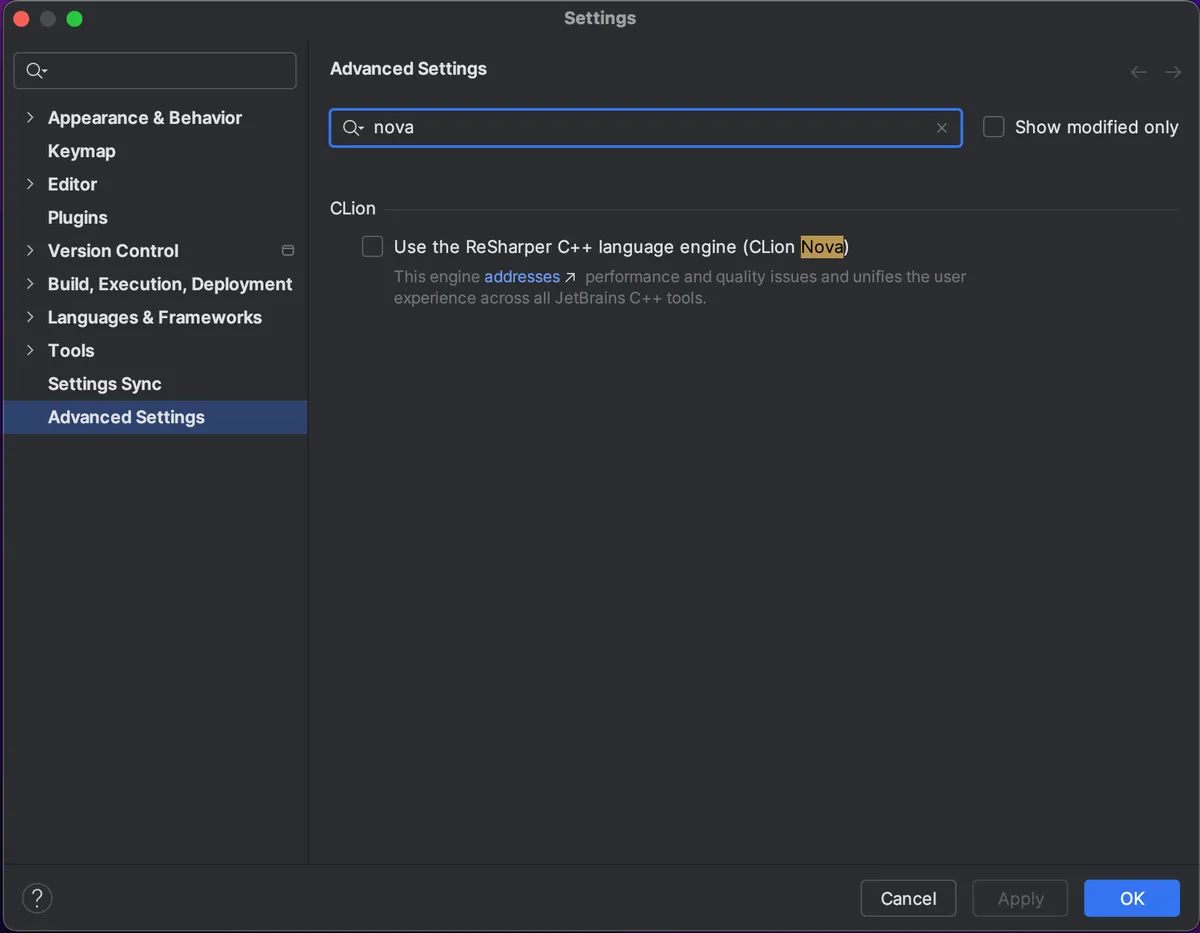
Turn off Clion Nova
The plugin currently doesn't support CLion Nova (the ReSharper engine).
Find and disable the option here: Settings -> Advanced Settings -> Use the ReSharper C++ language engine (CLion Nova).
Install the Plugin
Install the plugin if you haven't done so already:
Get PluginOpen a Project
Open either a folder as a project or a jamfile directly.
The selected folder will be used to store the CLion's configuration. The workspace root (the root of all source files) can be configured to a different folder later.
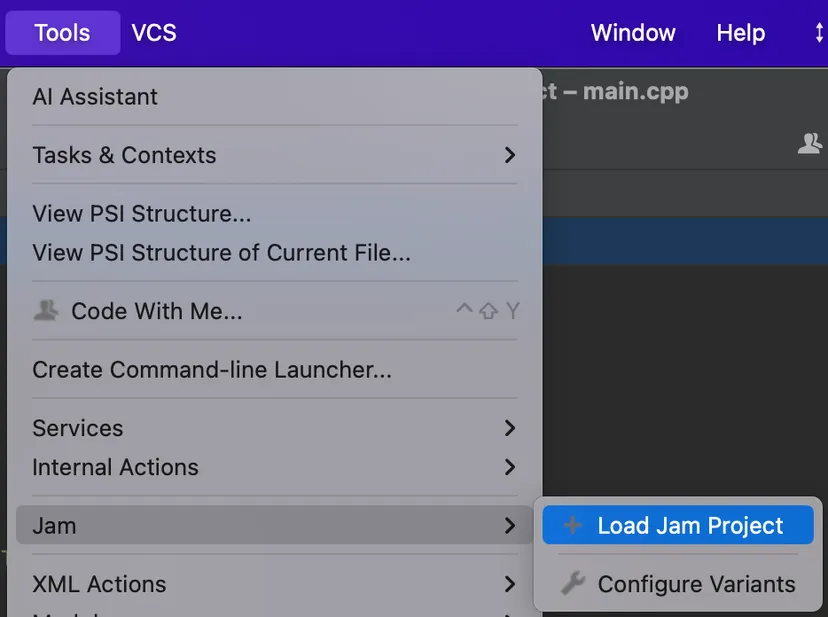
Activate the Plugin
The plugin has to be activated inside a specific project before it can be used.
This is done through the Jam Configuration Wizard: Tools -> Jam -> Load Jam Project.
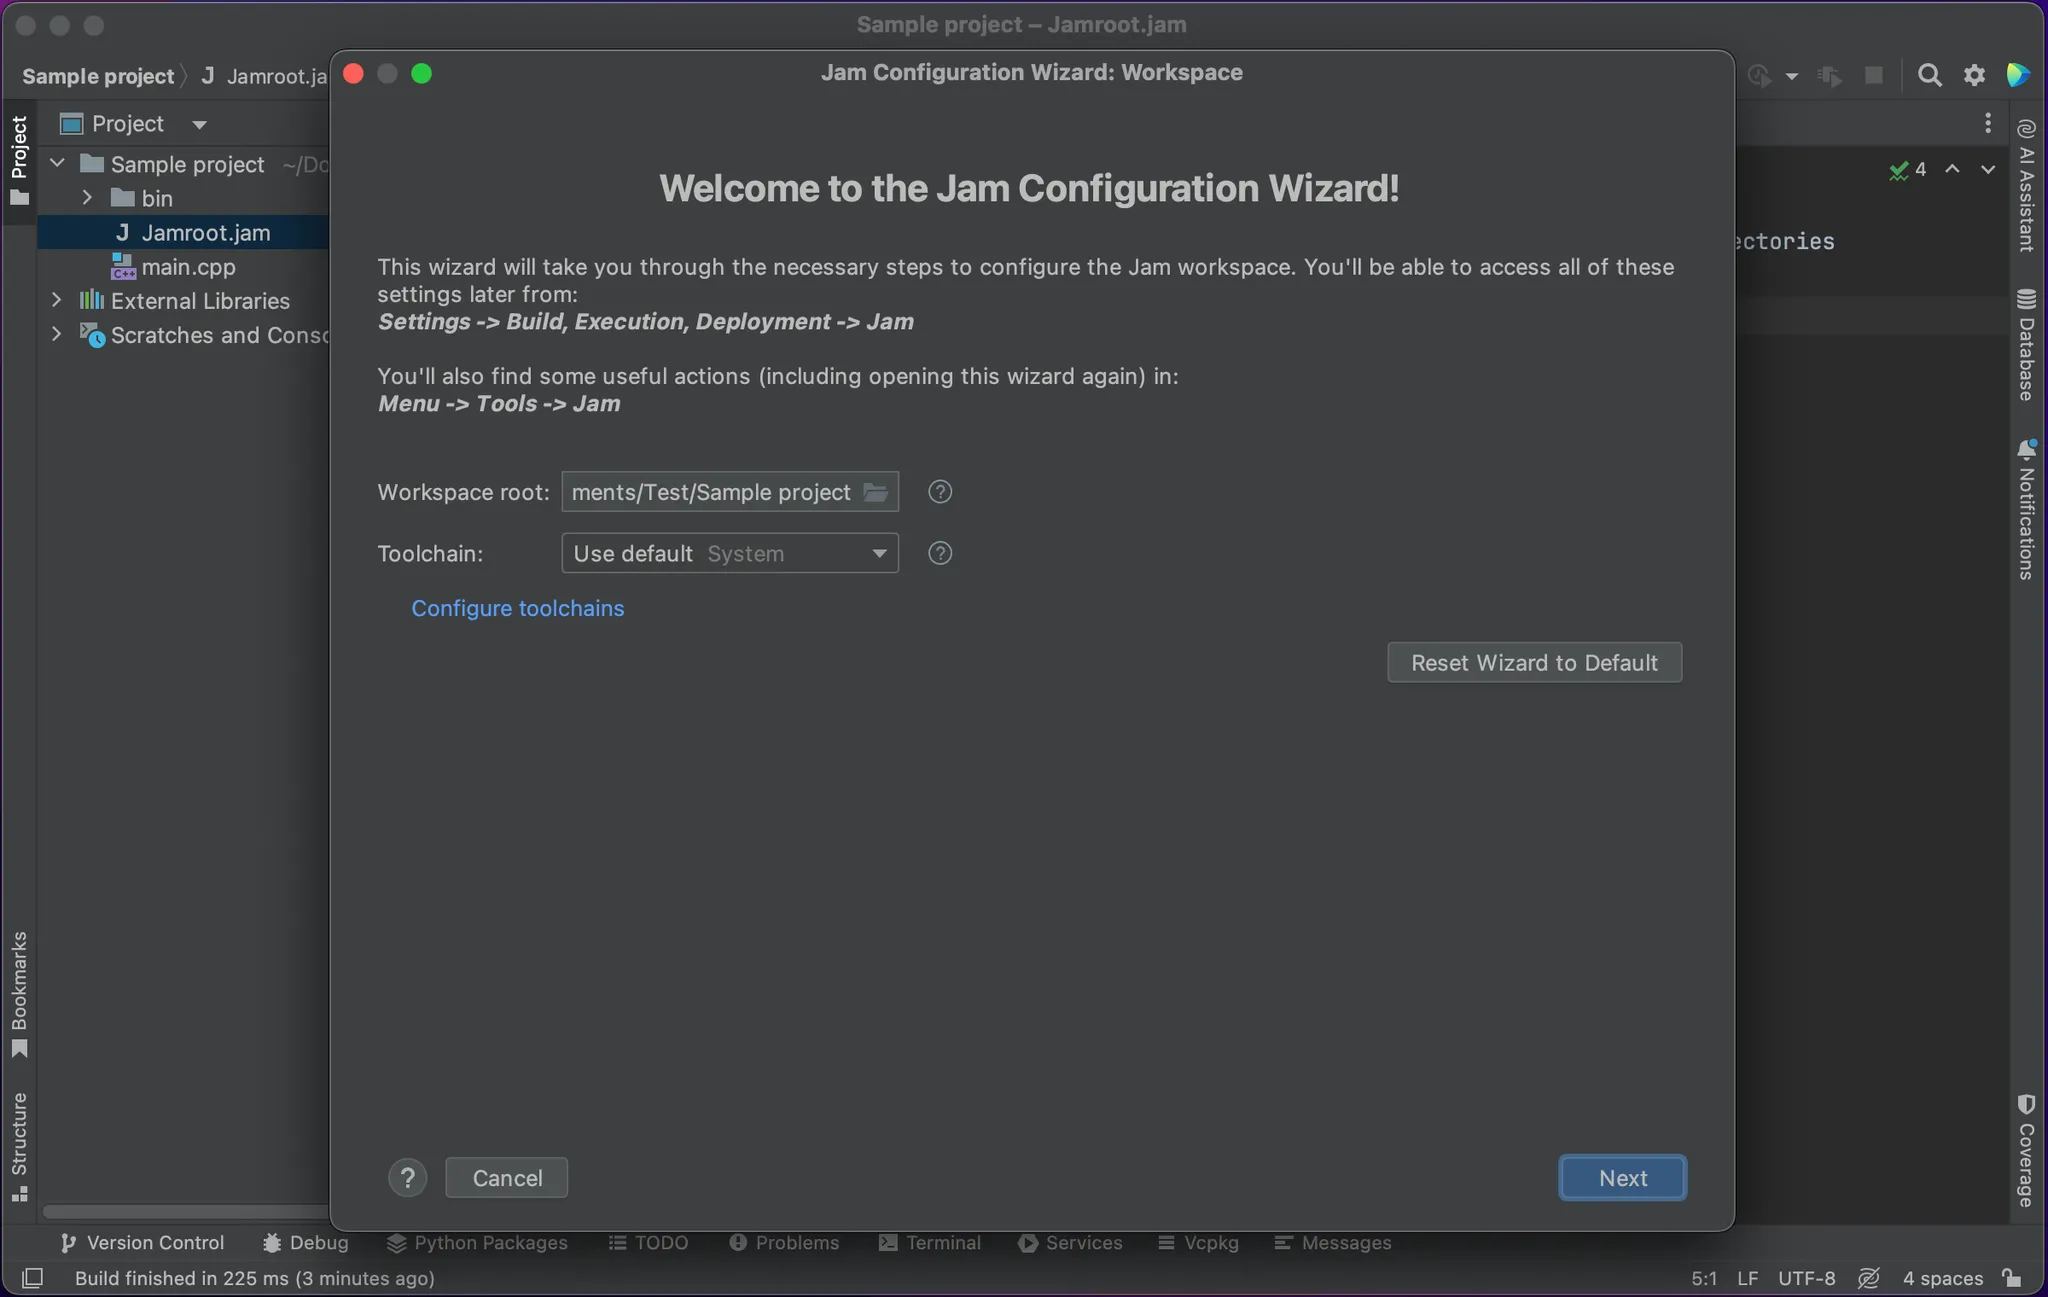
Go through the wizard
Workspace
Workspace Root
Recommended: Root of your repository.
It's used as the root directory of source files. It will be the root in the project view.
In most cases, this is the same as the project directory.
Toolchain
Click Configure toolchains if you don't see any options.
Recommended: Use a toolchain configured with the compilers that you use with Jam.
- It's used for:
- Debugger selection
- Providing additional include paths and define flags
- Providing context to correctly interpret the build commands
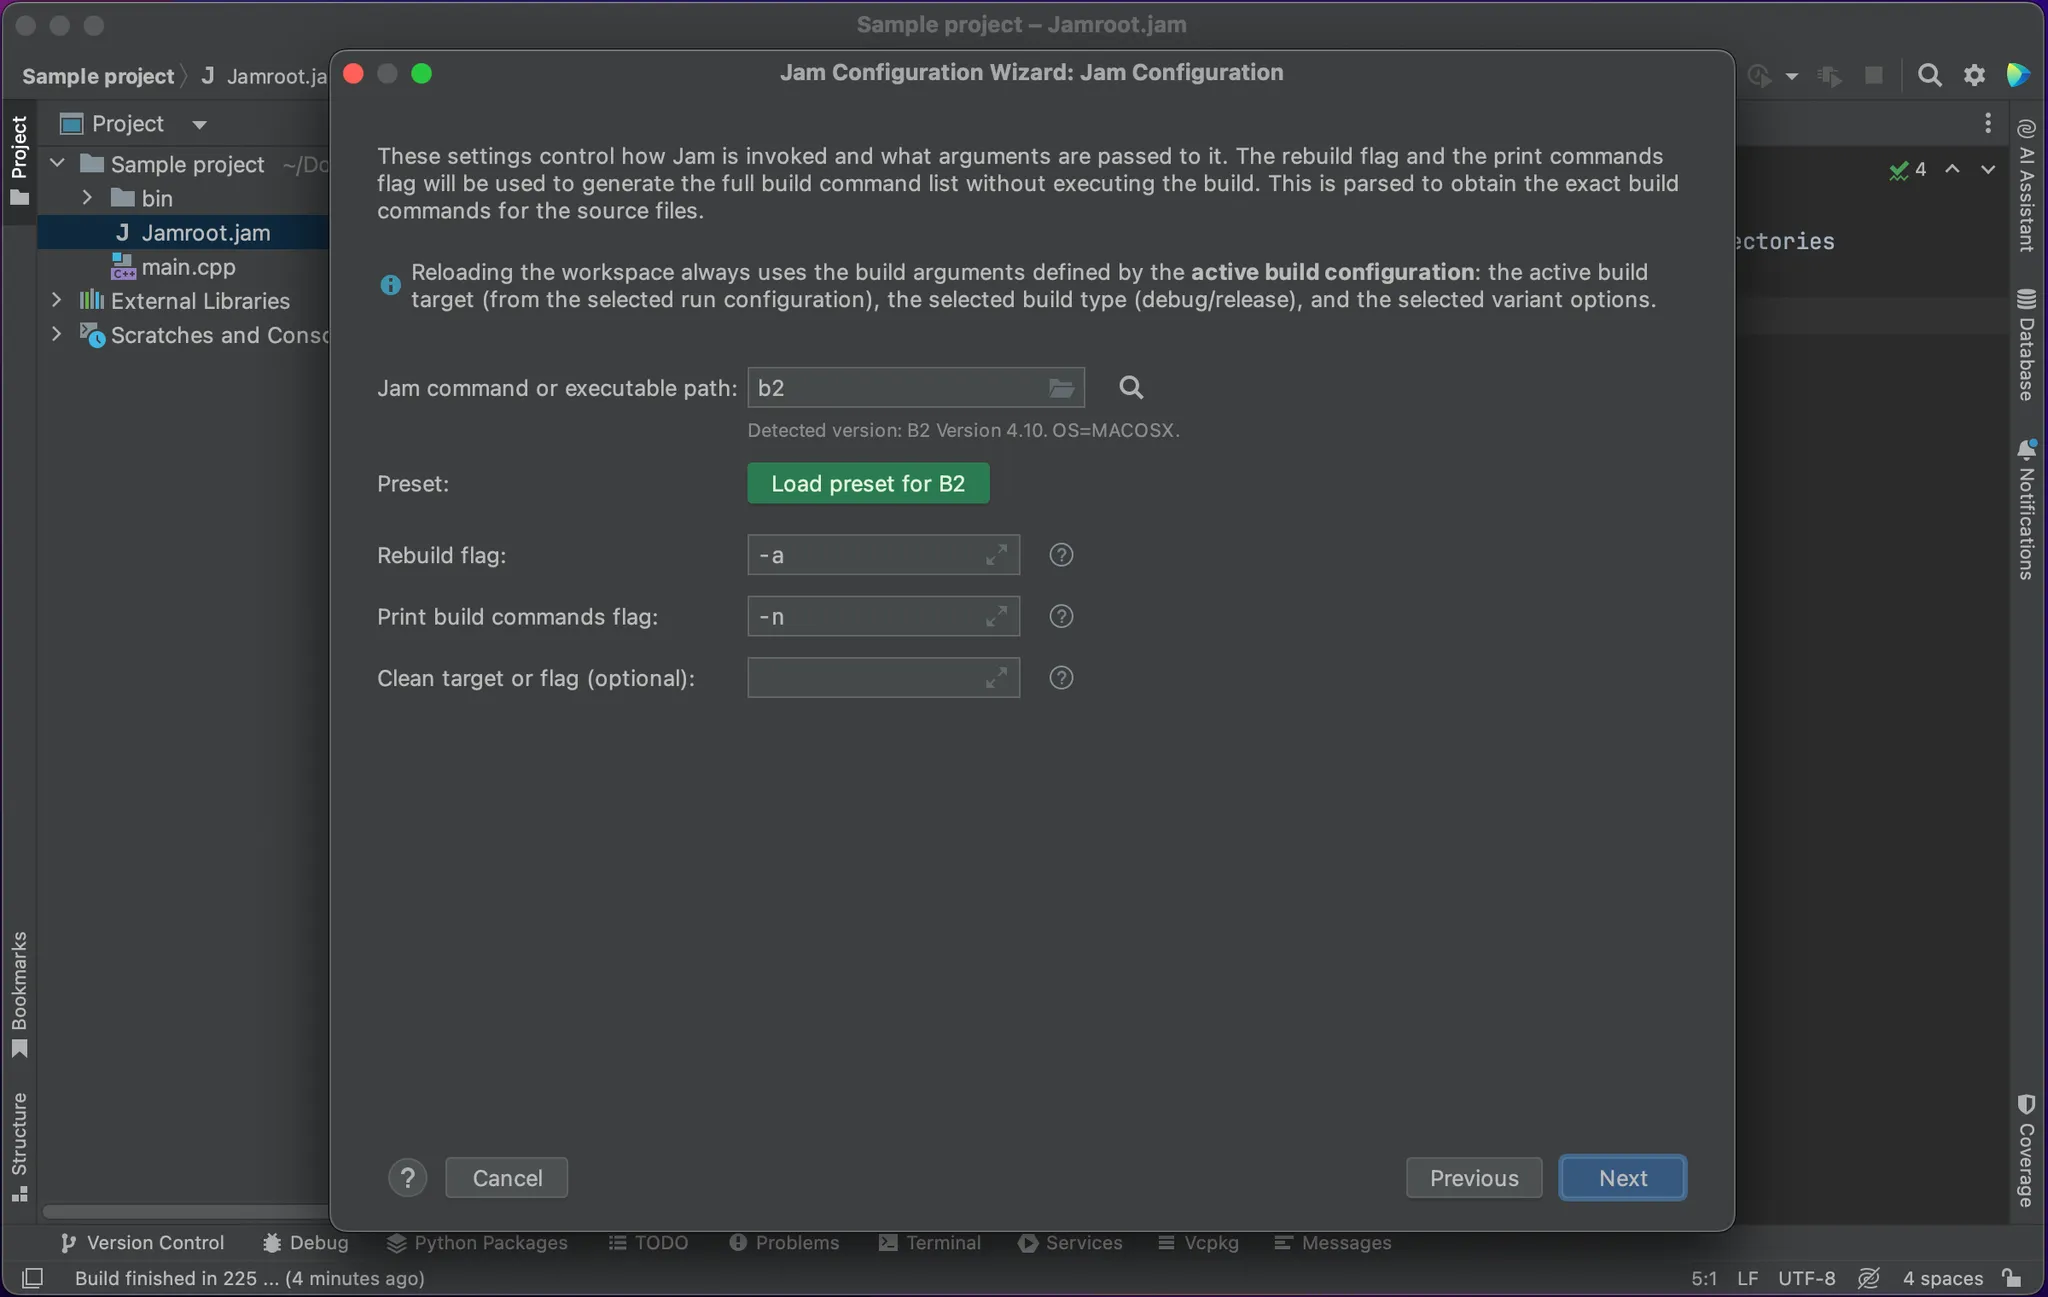
Jam Configuration
Specify the Jam command or the path to the Jam executable.
Load the preset if you see the option (as seen in the image). This is not available for every Jam version.
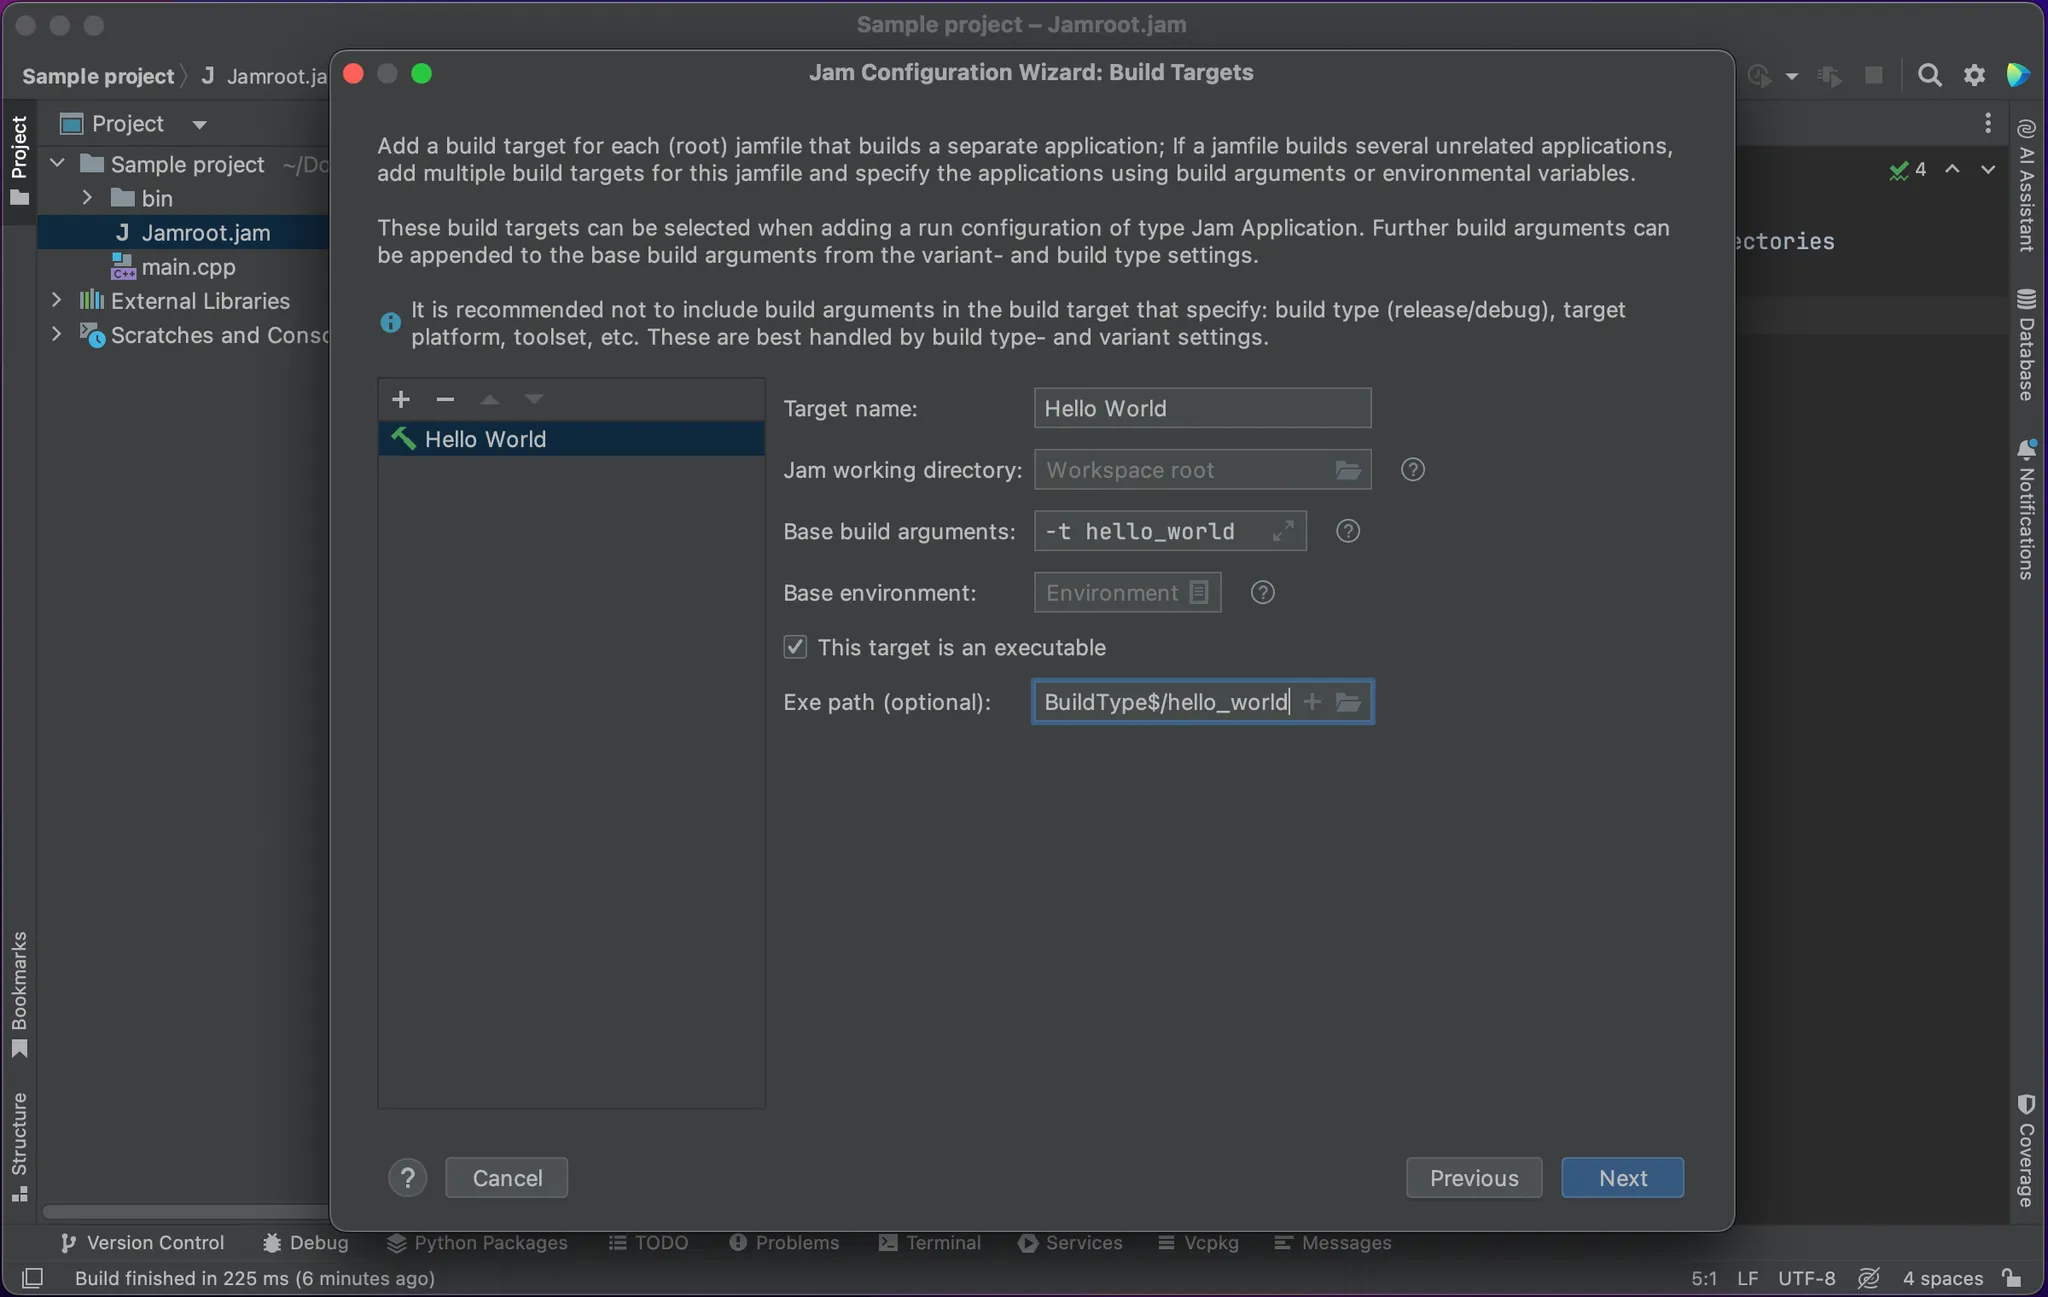
Create a build target
How many build targets do you need?
In simple projects, probably just one.
- You will need more if:
- There are several jamroot files (in case of a monorepo): add a separate target for each
- The jamfiles build several independent executables: these executables should belong to separate build targets
- Don't add separate build targets for:
- Release and debug build types (use build types instead)
- Frequently changing build arguments that apply to all build targets (use build variants instead)
In the build arguments (and environmental variables), specify only parameters that define this build target. Other parameters come later.
Exe Path
Recommended: Specify it if you can. Feel free to use macros in the path.
The plugin can't detect the resulting executable path (at least for now).
If left empty, the plugin will ask you to locate the executable when you try to launch it. This will be cached per-build-configuration.
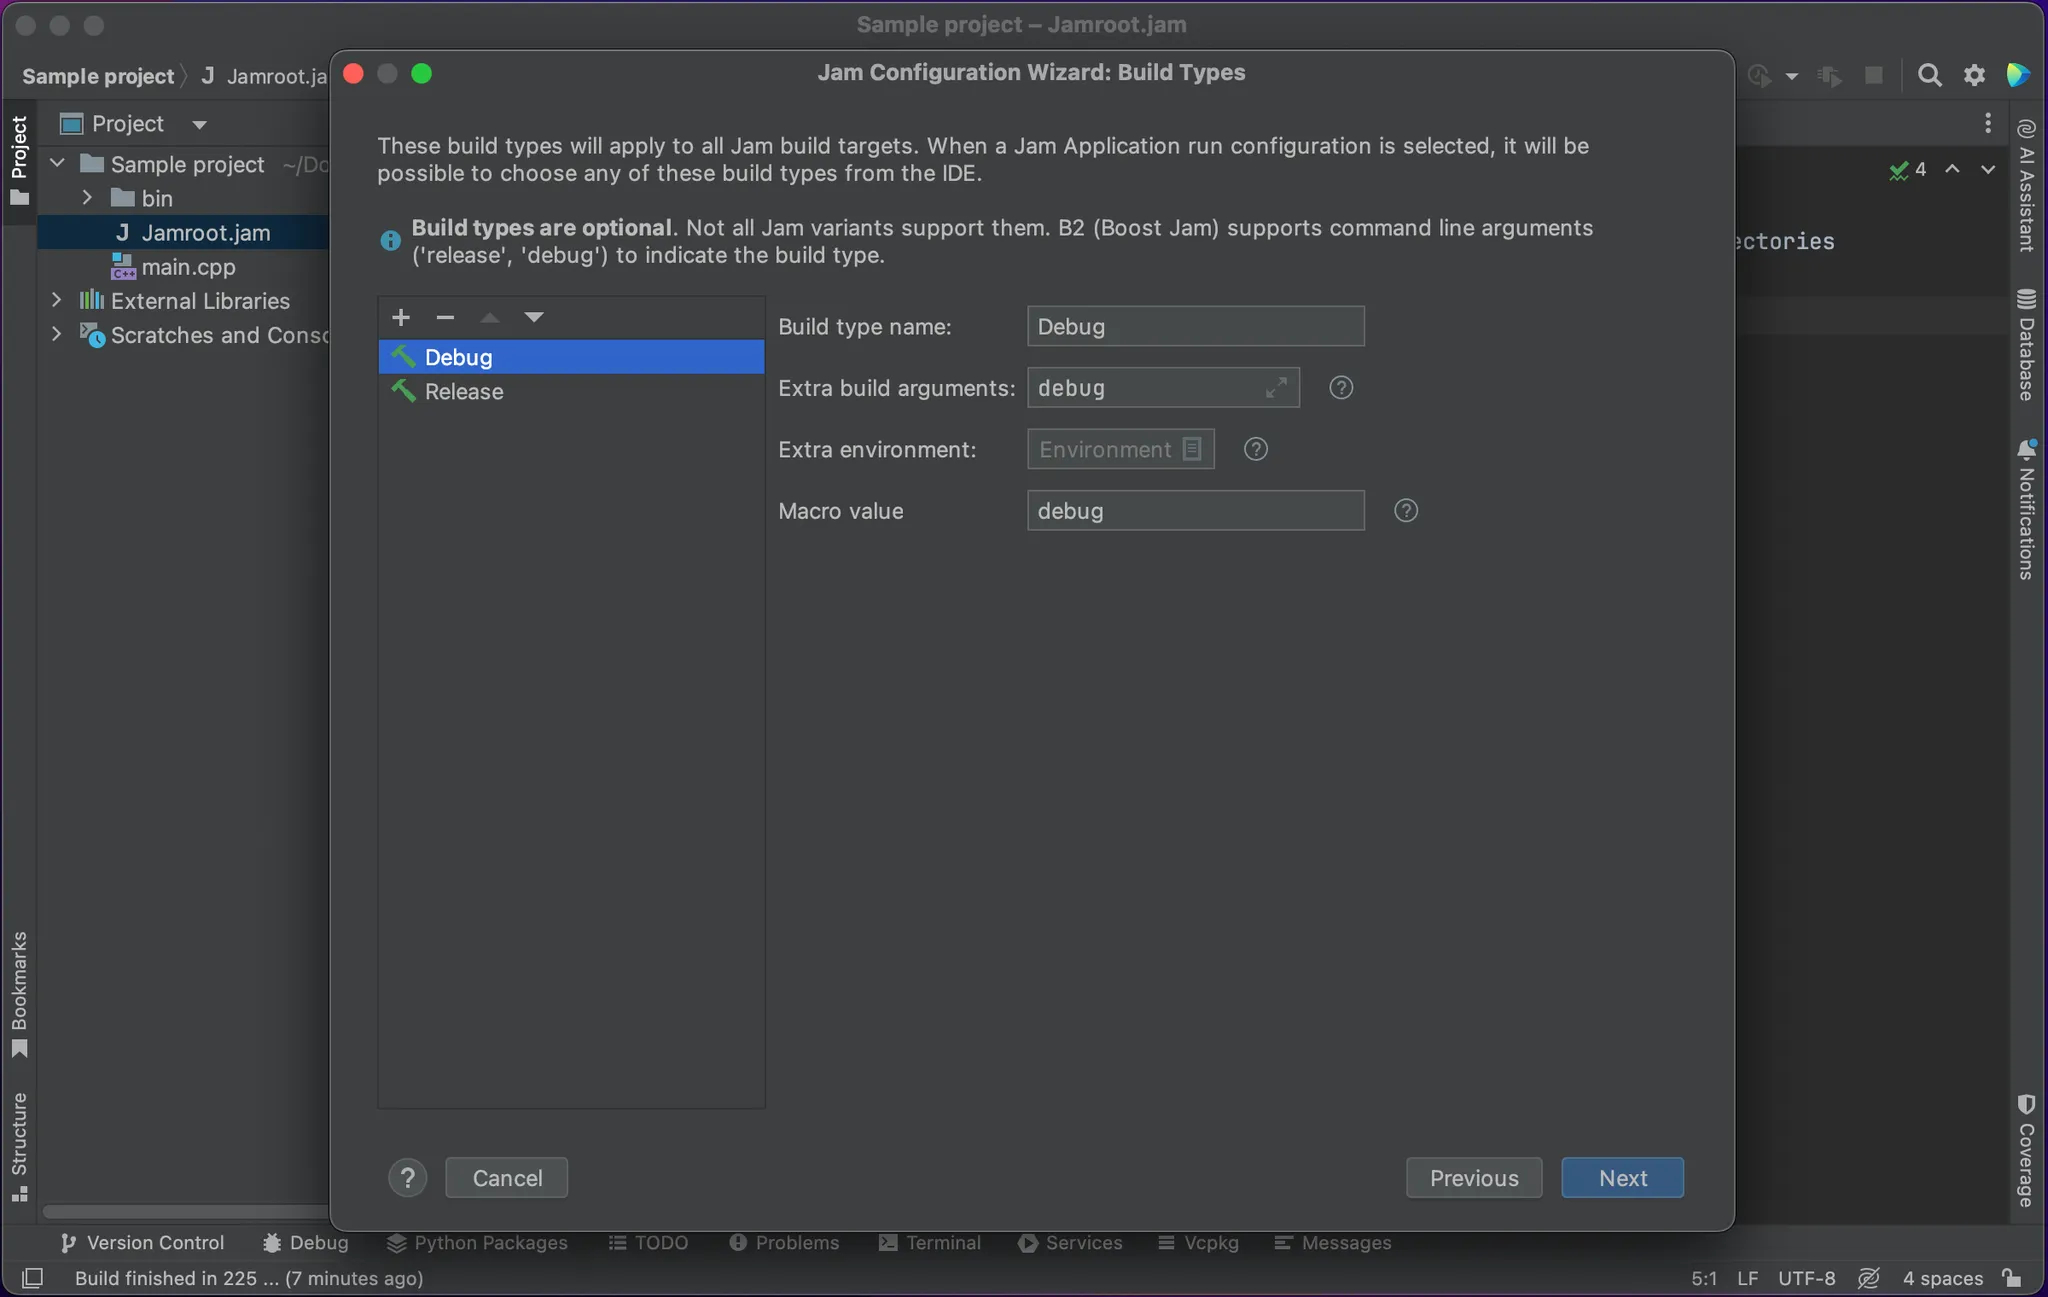
Create build types
This is how the plugin handles debug and release build types. They apply to all build targets.
Using B2
- B2 supports build types:
$ b2 debug(Extra build arguments = "debug")$ b2 release(Extra build arguments = "release")
Custom Build Types
If you use a custom build type implementation, you can specify the necessary build arguments or environmental variables here.
- Example:
$ jam -sConfig=debug(Extra build arguments = "-sConfig=debug")$ jam -sConfig=release(Extra build arguments = "-sConfig=release")
No Build Types
If you don't have build types in your project, just leave this list empty. Build types are optional.
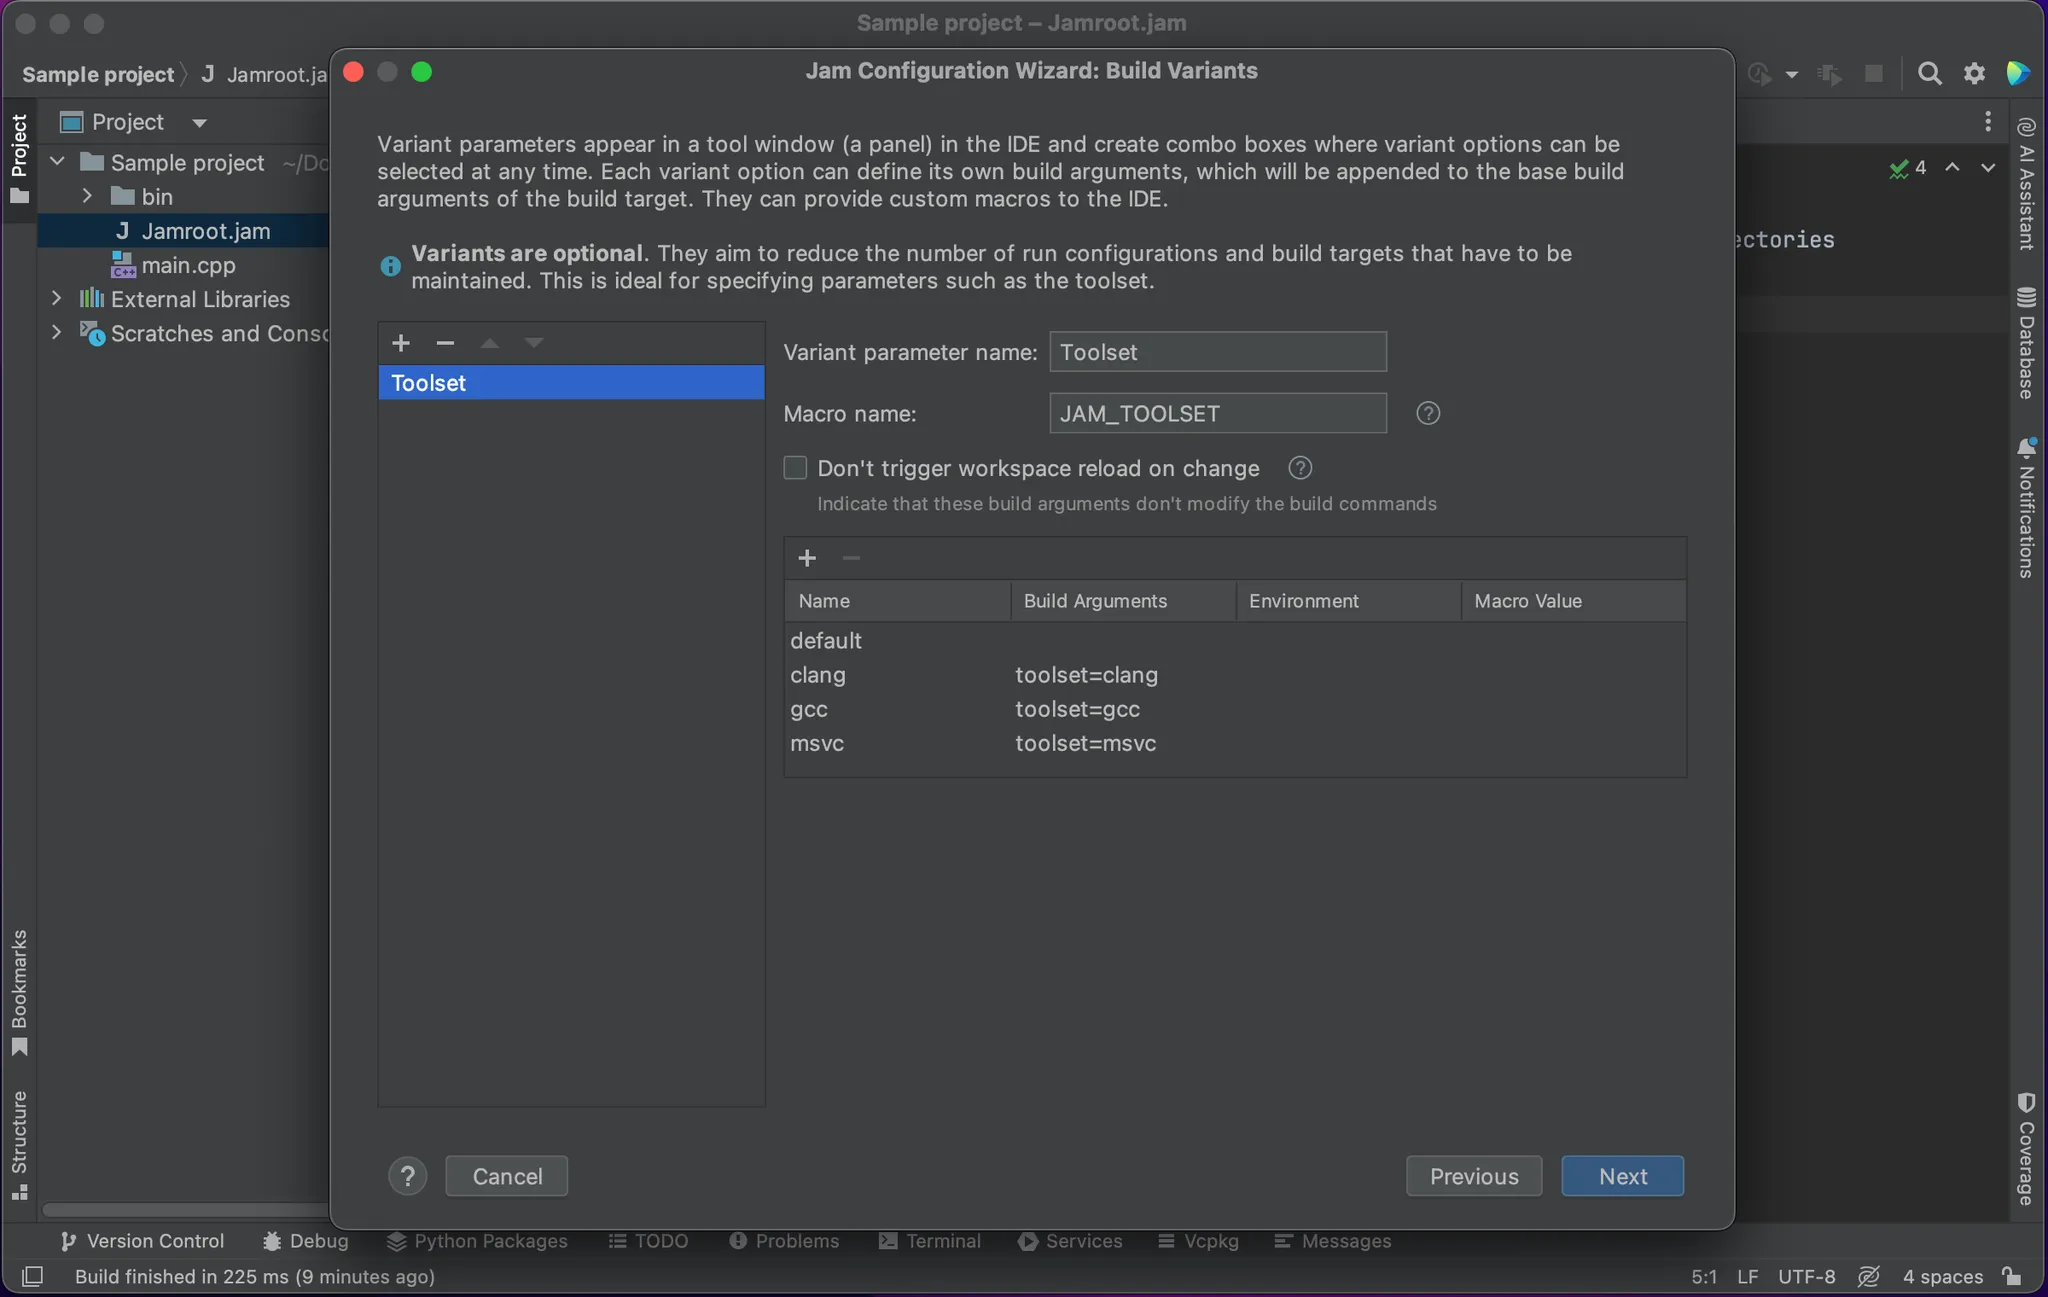
Create build variants
This feature allows you to change build parameters from a tool window at any time. They apply to all build targets.
The role of build variants is similar to that of the options in CMakeCache.txt.
It is an optional step, so the details are not included in the getting started guide. If you are interested, take a look here: Build Variants
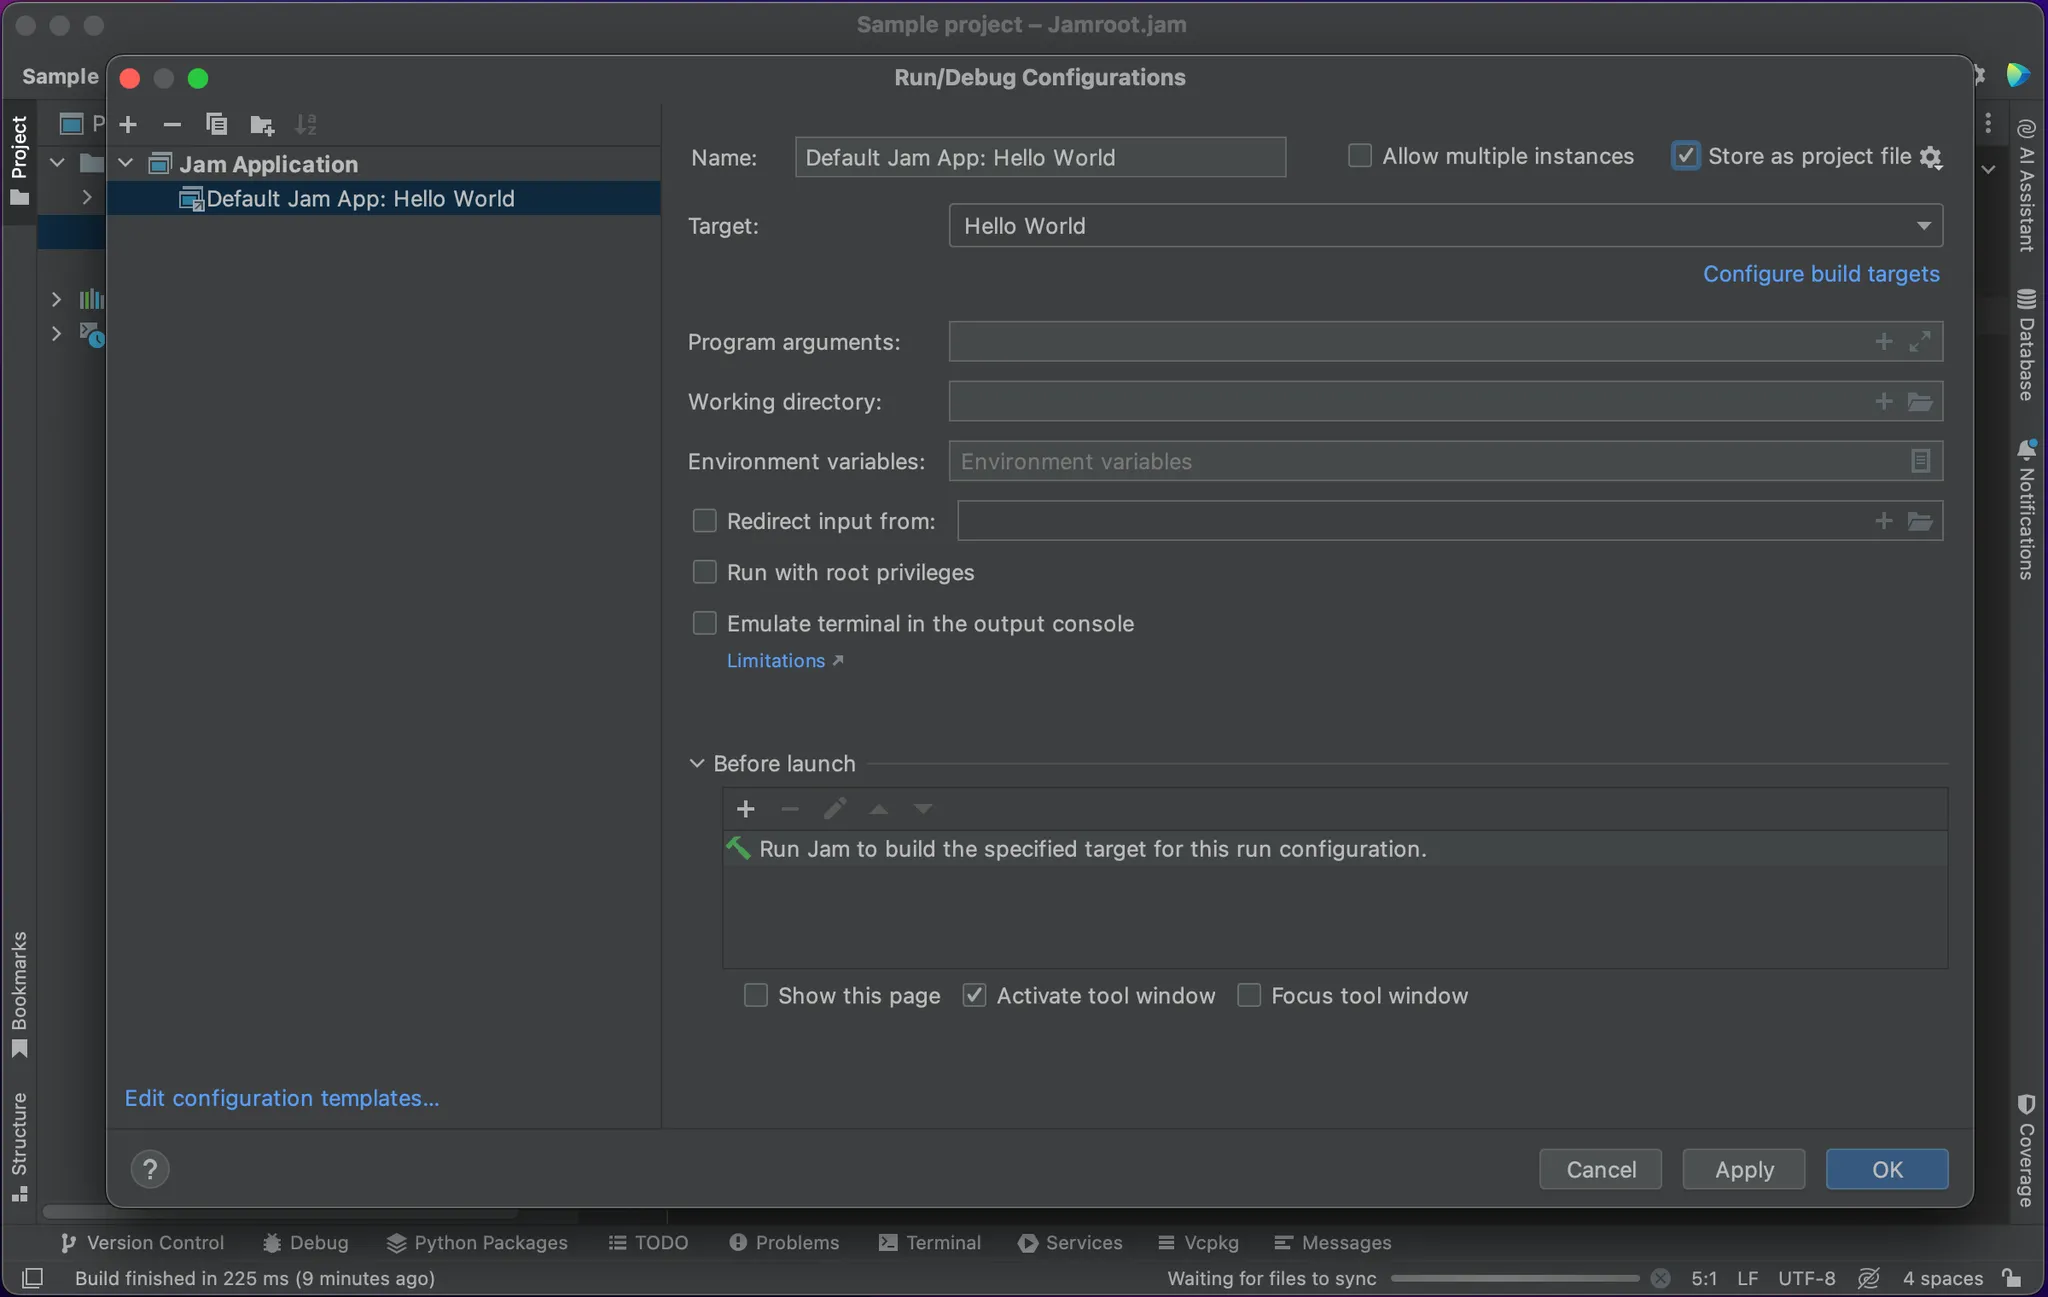
Create a run configuration
The workspace is configured based on the active build configuration, which comes from the run configuration.
Create a Jam Application and reference one of the build targets you defined earlier.
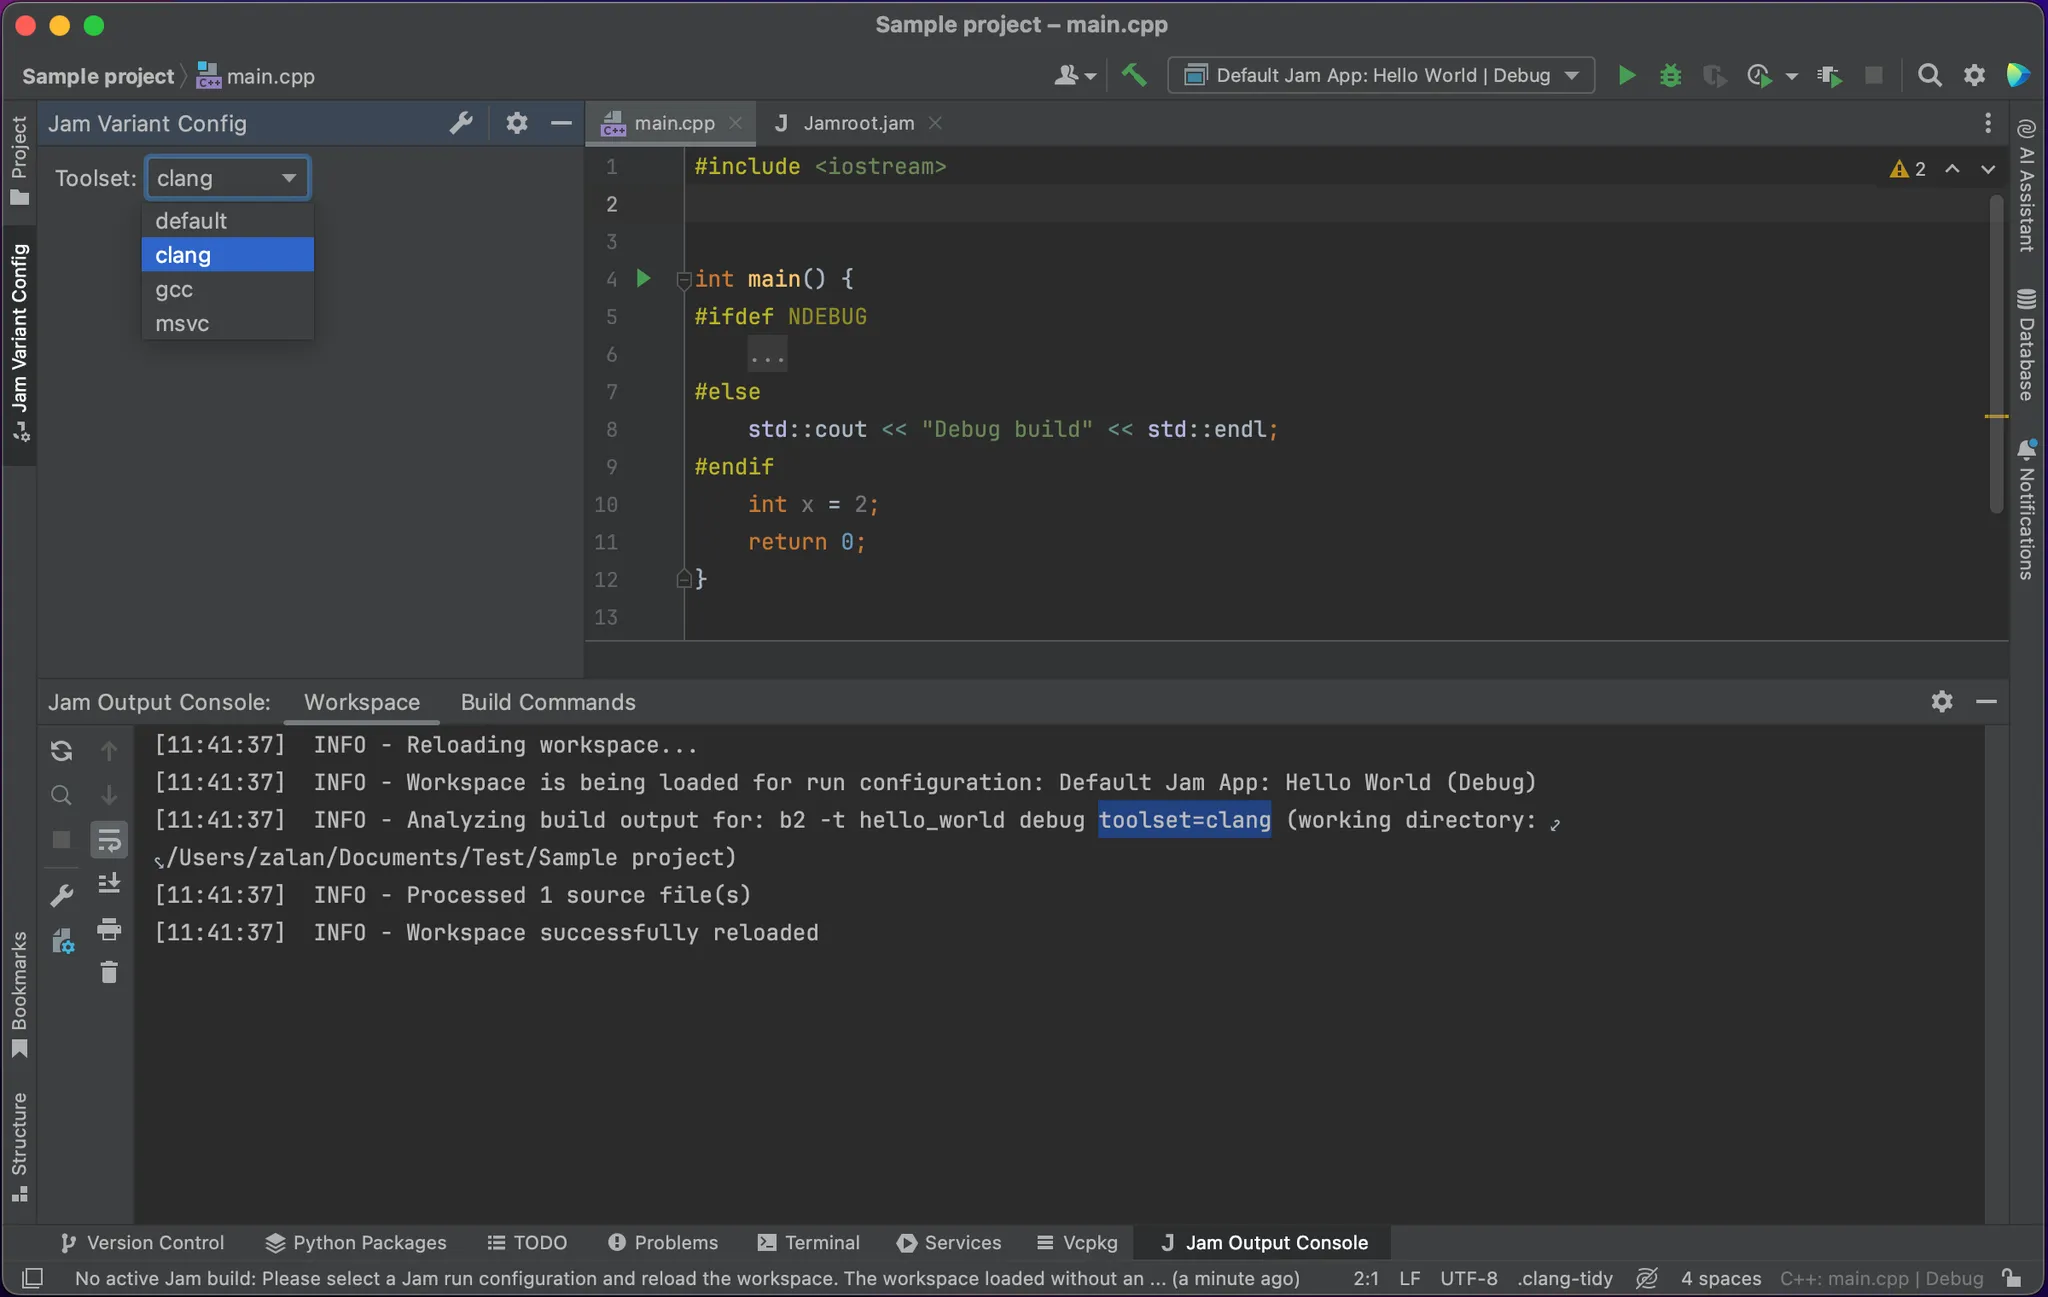
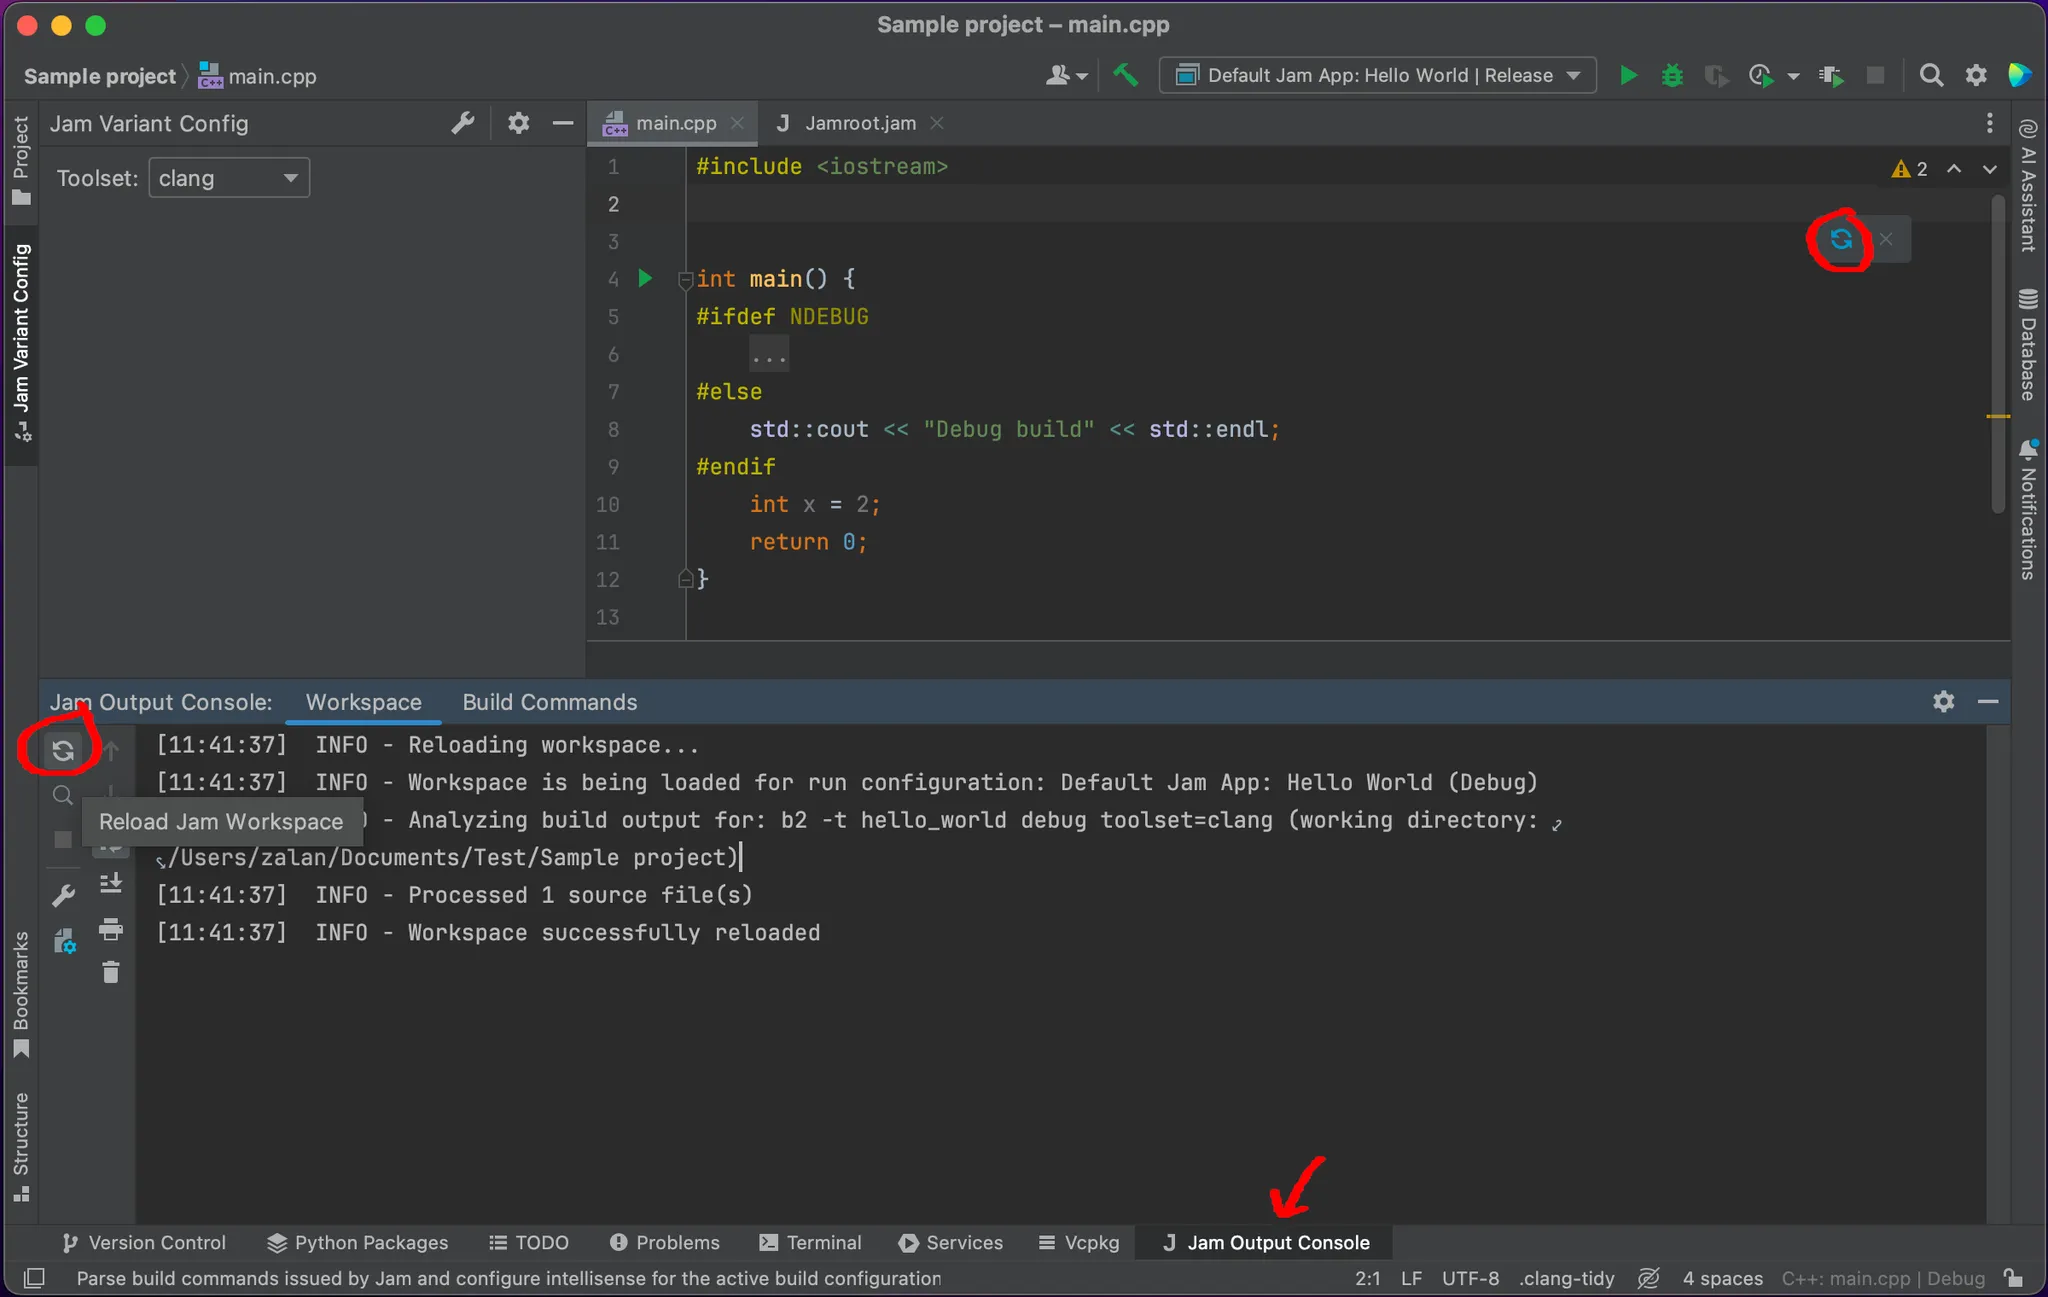
Reload the workspace
The workspace needs to be reloaded after any change in the build configuration.
After the build configuration changes, the plugin will offer to reload the workspace, but won't reload automatically.
If the workspace is not reloaded, the code completion features will use the previous build configuration.
You can reload the workspace any time from the Jam Output Console, as shown in the image.
You can verify that the workspace used the correct build command in the correct working directory: check the Workspace tab in the Jam Output Console.
If you encountered an error at this stage
The default settings won't work on every Jam variant or every project with custom configuration.
Fortunately, the plugin can be adapted to a lot of cases.
Unfortunately, it's tricky. Check the command parser configuration guide: Command Parser
Check the troubleshooting guides too. They describe a few common and easily solvable issues.
If nothing helps, you can report a bug here: Feedback
We are done
Enjoy!
Do you have a suggestion? Feel free to send it over in here: Feedback